18.12.11

Rhubarb Compote with Star Anise and Cinnamon


Very Healthy, Simple, Quick to Make and, of course, Delicious!
Rhubarb is an incredibly versatile vegetable that your body LOVES!!!!
Originated in China and used frequently in Traditional Chinese Herbal Medicine, it is a tonic and a blood cleanser, when used in small amounts. It also increases salivary and gastric flow encouraging the healing of stomach ulcers, it is a mild laxative and works miracles for your gallbladder.

Need I say anymore?

You will need:

3 cups of mineral water
Stevia to your taste {use whatever you wish to sweeten this recipe}
3 star anise flowers
2 sticks of cinnamon
2 teaspoons of vanilla extract
400 g chopped rhubarb {about 2 cm each piece}

Add the first 5 ingredients to a pan and bring to boil. With the lid off, let it simmer for about 10 minutes with the lid off and add the rhubarb. Bring it to boil, mix once and put the lid back on. Cook in low heat for 3 minutes and turn it off.
Do not mix with a spoon after the first mix, but you can move the pan around so it does not loose its shape.
Let it cool or have it warm with a bit of yoghurt or on its own as a nice breakfast or a desert.

Click here to see how I make my own fat free yoghurt!

Let me know what you think !!!!
   

17.12.11

Garlic & Lemon Chicken Roast and Soup


You see the soup first because it is not really nice to open a page and see a raw chicken on top of a few vegetables, is it?

Basically, I made a perfect roast chicken last Sunday and used the left overs to make an absolutely delicious chicken soup as I love the idea of not wasting left overs!!!

I hate waste and for a while now have been recycling my food because the data shocked me: In São Paulo alone, the waste on food goes to about R$ 14 billlions each year { almost double for US $ and treble it for English pounds}. 
I decided I cannot bear to play to much of a part on this, so here is one delicious idea.

Below, what you see is the chicken before it goes into the oven:


Roast Chicken:

1 chicken {organic or free range when possible}
5 cloves of garlic smashed
Zest and juice of one lemon {only the yellow part of the zest as the white will make the food bitter}
2 sprigs of flat leaf parsley
1 pinch of chillies {optional}
salt
freshly ground black pepper
2 bay leaves
1 fennel bulb chopped in 4
Hokaido {japanese pumpkin} in chunks
Mushrooms
Any vegetable you like

Mix the garlic, chopped parsley, lemon juice and zest, salt, pepper, chillies{if using} and spread it thinly inside the skin of the chicken. Lift the skin with your fingers and put some of this mix in and then from the outside massage the skin so you spread that seasoning on to the flesh. This will give your chicken some flavour, as normally the seasoning stays on the skin. But, as we cannot eat them on this diet, the flavours go on the actual bird.
Inside the cavity put a little of the garlic mix, 2 quarters of the fennel and a bay leaf.

On a pre-heated oven and a non stick tray,  roast the bird with the breast side down for 20 minutes and then lift the chicken from this tray {discard the liquid fat that stayed on it, as this will prevent you from the temptation of eating the fat that runs from the chicken} and lay the half roasted chicken on top of another tray where all the vegetables are laying already sprinkled with some salt and pepper. Take it back to the oven until it is done.
Allow 20 minutes per pound of chicken.
Let it sit for 5 minutes before you serve it, so the juices settle and make sure not to eat the skin if you are on any diet. But if u r not...well, have my bit!!!!

For the Soup:

Add the carcass and any left over vegetables that have been roasted {chop them into small bits first} to a pan with enough water to cover it. Let it boil for about 20 to 30 minutes.
Remove the bones, shred the chicken and serve with a handful of spinach leaves thrown in just as you switch the heat off and a handful of fresh parsley.
Enjoy!!!!!!


10.12.11

Clouds Chocolate Cake


This is, in my opinion, one of the best things I have done, chocolate wise and most definitely low carb wise.
Chocolate inspiring, an Angel must have been passing by...

Like all cakes, I prefer to eat it warm.

It surely was an amazing way to start the day and eat my two tablespoons of oat bran.

I guess you can add any flavourings you want, some orange zest or a teaspoon of dried coffee granules...why not???

My advices are: do not double the recipe, get a small baking tray {I used 20cm X 20cm} and try this way first, then next time vary the flavour...or not...

You will need:
4 eggs
1 heap teaspoon baking powder
1/2 cup quark
1 teaspoon vanilla or almond essence {I used half and half}
1/3 cup xilytol {or sweeten to taste with your sweetener }
2 heap tablespoons cocoa powder
8 tablespoons oat bran

Pre-heat the oven to 200 degrees centigrades.
Add all ingredients together and mix well. Let it sit for 5 minutes and mix again.
Spread some oil on a non stick baking tray and remove the excess with kitchen paper.
Pour the batter and take it to the oven, top shelf.
I baked mine on 200 for 5 minutes and then turned it to 180 for 10 minutes. Keep looking. It will be good when you touch the top and it stops wobbling in the centre. Remember all ovens are different.

If you want it gooey so that it becomes a self saucing dessert, make sure u have it cooked around the borders but leave a little wobble on the centre. In this case, you have to have it hot!!!
Please, do share your comments!

DO NOT leave it inside the oven after you turned it off because it carries on cooking and it will dehydrate anything that stays in there. That is a massive mistake people make. That is how I make my sun dried tomatoes, by the way.
Wait until for 5 minutes and tuck in.

Let me know what happens, I am curious...

9.12.11

Chocolate Truffles


Well... I do not remember ever being as pleased with my food-head as I am now!!!

I was remembering of a truffle my mum used to make with powdered baby milk and even before I could think anymore, I was in the kitchen.
In less than 2 minutes I had truffles...
And so will you...

They will need to be eaten pretty quickly as they harden with time...If you are like me, you will eat them on the spot ...but if you are going to eat later, add more water and wait 5 minutes before you roll them. After rolled, leave them on a sealed container and cover with the cocoa just before serving!!! You can even skip the cocoa, they are delicious even without it!!!
It is heavenly!


You will need:
4  tablespoons of  milk powder {I used skimmed}
1 tablespoon of 100% cocoa powder and a little more for dusting
2 or 3 tablespoons water, fromage frais or quark {start with 2 and add the rest slowly, if necessary, so you get a thick paste consistency}
Sweeten it to your taste {sugar, palm sugar, sweetener, you choose}

Optionals:
Pinches of ground cinnamon, chillies, sea salt, cardamom, cloves, nutmeg
You can also use a drop of essential oils like peppermint, bergamot, mandarin, etc...just make sure it is of excellent precedence and preferably organic...
Or you can use almond, vanilla, rum, lemon, strawberry or your favourite flavouring a couple of drops is enough.

Add all the ingredients in a bowl and mix well.
Wet the palm of your hands a bit and roll a teaspoon at a time.
As I prefer to eat pretty food, I put them on a plate and dusted some cocoa powder on top...
It does not hurt to feel pampered...


7.12.11

Thai Chicken Laab


Thai Chicken Laab... Heavenly...
One of my favourite Thai dishes and so easy to make.
This is a little fusion version of it as I omitted the ground roasted and ground sticky rice as I eat a high protein diet.
If you do not have or do not like any of the ingredients, use the ones you have.
I like to serve it on a bed of gem or iceberg lettuce as the crunchiness and varied textures make me Smile. Every time.


You will need:

200g minced chicken thigh {turkey or pork}
1/4 cup of boiling water or stock
1 or 2 bulbs of lemongrass bashed with a knife and cut into very thin slices {use only the softer part}
Juice of one lime
Fish sauce {nam pla}
1 red chilli sliced finely
1 spring onion sliced finely
1 small red onion in thin slices {or 6 shallots}
Fresh mint leaves chopped roughly
Thai coriander leaves chopped roughly

On a non stick pan, put the water and the meat and let it boil, turn it down and stir to break the lumps. When cooked {about 2 minutes} add lemongrass and chilli stir and immediately turn it off. Add lime juice and fish sauce. Add the red onions or shallots, the spring onion and the herbs. Adjust the seasoning.
Serve warm or cold on a bed of crunchy lettuce and get ready for a bang of marvelous flavours.


30.11.11

Coronation Chicken


This dish is DELICIOUS...
And very easy to make!!

You will need:

2 chicken thighs or one breast {cooked or roasted}
200g fat free plain yoghurt
1 teaspoon Dijon grainy mustard
1/2 cup of deseeded green grapes cut in half
1 tablespoon curry powder
1/4 teaspoon flake dried chillies {optional}
salt to taste
Mustard cress to decorate

On a bowl, mix the yoghurt with the curry powder, salt, chillies {if using} and mustard. Let it sit for a few minutes until the curry flavours blend with the yoghurt. Remove the skin from the chicken pieces and shred it. I prefer to shred than to cut into pieces because the texture is softer and it absorbs the sauce better. Add the grapes and mix everything together.
Let it sit for a couple of minutes and serve it decorated with the cress.

I normally have it with a green salad!
It is such a lovely meal!!!

27.11.11

Fresh Haddock & Scallops in Thai Inspired Sauce


Extremely easy to make and absolutely wonderful to look at ... and to eat...

Truth be told, I don't have my pestle and mortar with me, so I decided to 'lift' a ready made thai curry paste. So, this is not an authentic thai curry, one of those I learnt from my mentors in Thailand, but it is delicious.
Buy a paste that you like. You will find Thai curry pastes in any Asian grocers. If you do not have all the fresh bits that go in this recipe, use the ones you have as it makes all the difference.

Read the whole recipe first before you adventure into your kitchen. This is paramount to all asian recipes. Always.
Prepare the ingredients and leave them ready to be used so it won`t ruin the timing of the cooking.
This recipe is very quick to make once everything is prepared.

You will need:

2 white fish fillets cut in 5 cm each {I used fresh haddock}
4 to 6 scallops {or any seafood treat that you may want to use, like prawns and squid}
200ml coconut milk {can be the light version}
2 tablespoons of thai curry paste
3 slices of galangal or ginger
1 bulb lemongrass beaten once with knife or a hammer and cut along its length
4 kaffir lime leaves with no stalk in the middle of the leaf as it will make it bitter, slice the leaves very thinly
Green pepper pods or use the french ones for 'poivre' sauce {optional}
1 teaspoon of palm or demerara sugar
2 tablespoons of thai fish sauce {nam pla}
Handful of  thai basil {or any that you can get your hands on}
1 fresh red chilli for decoration or more if you like it hot

In wok or a shallow but wide pan, add the coconut milk until it boils, reduces and separates a little, add the garlic with the paste and let it fry until fragrant stirring all the time. Add the galangal or ginger, lemongrass and, if using, the chilli. Add rest of the coconut milk and bring to boil and and add the sugar and the fish sauce, mix well and after 10 seconds add the kaffir lime leaves, fish and the seafood turning the pan around so you don't have to mix and disturb the fish which will then flake and you do not want that. Let it cook in medium heat, for about 2 minutes then turn the fish until it is cooked through which should not take more than 2 minutes depending on how thick it is, of course. Add the basil leaves spreading them around the pan and, again, turn the pan from side to side until the basil is submerged.
Decorate with the fresh chilli and serve it with white rice, vegetables and if you are like me with a fried egg.

Tip: Don't cook the fish and seafood for too long or it will ruin its natural texture and become dry and chewy. Remember that after you turn the heat off the heat will still cook the ingredients until you serve it.

6.11.11

Black Seafood Soup {Sopa Negra do Mar}


Black Seafood Soup

It is actually, more of a stew than a soup.
The broth is abundant and warming.
The smell is divine and delicious. The texture is diverse. The flavours are delicate and at the same time explosive...

If possible, go to a proper fish market or your local fishmonger, like I did and see what is the catch of the day. Forget frozen fish. Everything on this soup was fresh and I believe this made all the difference.
You must use only the ingredients you really love so the satisfaction factor is maximized. Swap the fishes and seafood for your favourites, if you want or if you don`t find the same ingredients I used.
Creat your own marvelous soup...

From the market:
King Prawns {as many as you want}
1 handful of prawns head and shells
1 handful of baby squid {ink included}
2 flavoursome white fish steaks {haddock, cod, sea bass, halibut, etc}
4 salmonetes or 1 red mullet {cleaned}
1 leek
1 onion
2 cloves of garlic grated in half a cup of olive oil
Fresh flat leaf parsley{stalks for the stock and leaves for the soup}

From the garden:
2 chopped tomatoes {no seeds}
1 chopped courgette
1 handful of basil leaves and flowers{whatever basil you can find, I had purple in the garden-beautiful}
4 nasturtium leaves and flowers {optional}

From the pantry:
Extra virgin olive oil
Dried oregano 
1 jar of cooked chick peas {rinsed}
2 cayenne peppers chopped
Fleur de sal or sea salt

In a big pan put 1 litre of water, half of the onion, the green part of the leek and the parsley stalks and bring it to the boil and let it simmer for 20 minutes and add the prawns heads and shells. Once you bring it back to boiling point, switch it off and put the lid on it. Let it cool and sieve it, reserving the stock. It is better to do this as soon as you get back from the market and reserve. This can be kept in the fridge already sieved for 2 days or frozen.

Whilst the stock was simmering, I made a green salsa with the basil, nasturtium and parsley {chopped roughly, not to thin with a knife as i do not like to use a blender my salsas}, the basil flowers, half a clove of garlic chopped, salt and olive oil.

On a shallow pan, heat up the olive oil and sauté the sliced leek, a teaspoon of oregano and a tablespoon of sweet paprika, the cayenne peppers and after 30 seconds add the tomatoes, chick peas, the onion and the courgette.
Cook for about 5 minutes, add the stock and bring it back to boil adding a glass of dry red wine.
when this is ready and delicious, adjust the salt and freshly ground pepper, add the fish steaks and cook for 1 minute then add the salmonetes, baby squid with the ink and put the lid on. Boil and turn it off.
On a frying pan in high heat, dry fry the prawns with the head and shells until the grilled mark shows. Add a ladle of the stock until they turn pink and add the olive oil with the grated garlic. Shake the pan and add the salt and the chopped parsley. Mix again and add it to the soup, shaking the pot a bit to accommodate the prawns in the stock and to spread the garlic flavour on the soup.
I finished it with a tablespoon of the salsa on top to add more flavour and color to the soup.
Serve it hot with a piece of bread to mop up the dark juices created by the squid's ink and its incredibly lively flavours and colours...

Served with a glass of Tempranillo, I could not want for anything else in life...


Sopa Negra do Mar

Na verdade, é mais um ensopado do que uma sopa. 
Sustentável pois uso todas as partes dos ingredientes, nada é dispensado.
O caldo é abundante e fumegante. O odor é estupendo, incomparável, delicioso. A textura é diversa e surpreendente. O sabor é delicado e ao mesmo tempo explosivo...

Se possível, vá a um mercado de peixes ou à sua feira, como eu fui, e veja tudo que está em época. Esqueca os congelados. Tudo nessa sopa era fresco, acredito que isso fez toda diferença.
Você deve usar somente os ingredientes que lhe apetecem para maior satisfacão e troque os peixes, os frutos do mar se não gostar dos que eu usei ou não encontrar os mesmos. Crie sua própria maravilha...

Do mercado:
Camarões grandes à gosto
1 mão cheia de cabeça e casca de camarões pequenos 
1 mão cheia de lulas pequenas com a tinta 
2 postas de peixe branco e sem espinhos {usei badejo}
4 trilhas limpas
1 alho poró
1 cebola
2 dentes de alho ralados em meia xícara de azeite
Salsinha {rama para o caldo e folhas para a sopa}

Do jardim:
2 tomates sem sementes picadinho 
1 abobrinha picada rusticamente
1 mão cheia de manjericão - folhas e flores{use a variedade que tiver eu tinha roxo, ficou lindo}
4 folhas e flores de capuchinha {opcional}

Da dispensa:
Azeite extra virgem
Orégano seco
1 lata de grão de bico cozido {lavado e escorrido}
2 pimentas caiena secas e picadas
Flor de sal ou sal grosso

Numa frigieira alta,  coloquei 1 litro de água, meia cebola, os talos do alho poró e os talos da salsinha. Deixei ferver e após 20 minutos coloquei as cabeças e casca dos camarões. Após levantar fervura, eu desliguei e deixei isso tampado até esfriar e coei. Reservei somente o caldo. {Faça isso assim que chegar do mercado e reserve. Isso pode ser guardado na geladeira já coado por 2 dias ou congelado}.

Fiz um molho de ervas com o manjericão, as folhas e flores de capuchinha e salsinha {picadas rusticamente e não muito finas com a faca, não gosto de bater meus molhos liquidificador}, as flores do manjerição, meio dente de alho picado, sal grosso e azeite. Reservei.

Na panela, esquentei um pouco de azeite e fritei o alho poró em rodelas finas, uma colher de chá de orégano seco e uma colher de sopa de páprica, 2 pimentas caienas secas picadas e, após 30 segundos, coloquei tomates picados, grão de bico, o restante da cebola picada e abobrinha.
Isso cozinhou por aproximadamente 5 minutos e eu adicionei o caldo coado dos camarões e levantei fervura de novo adicionando uma tacinha de vinho tinto seco.
Quando isso ficou pronto e delicioso o suficiente, ajustei o sal e pimenta do reino moída na hora, coloquei as postas de peixe e deixei cozinhar por 3 minutos e depois adicionei as trilhas, as lulinhas com a tinta e cobri. Assim que ferveu eu desliguei.

Numa fridigeira separada, eu fritei a seco os camarões grandes, com cabeça e tudo, até marcar o escuro do grelhado. Adicionei uma concha de caldo e deixei que ficassem cor de rosa e adicionei azeite e alho ralado que havia deixado marinhando em azeite ao lado pois tinha pouquíssimo alho, isso foi uma maneira de encompridar o alho, fazer seu sabor ir mais longe... Dei uma sacodida de leve na frigideira, joguei uma pitada de sal em flor (pode usar sal grosso) e a salsinha picada. 
Mexi e joguei por cima da sopa. Dei uma mini mexida para acomodar os camarões ao caldo e espalhar o sabor do alho ao caldo.
Finalizei com uma colherada de azeite de ervas picadas por cima para adicionar mais delícia e cor à sopa.
Servi bem quente e com um pedaço de pão para sugar os sabores do caldo da sopa que ficou preta, inusitada e absoulutamente empacotada de sabor, cor e vida...

Com uma taça bem linda de Tempranillo, não queria mais nada dessa vida...


29.10.11

Berinjelas ao Alho {Aubergines in Garlic}


Antes de viajar, fui jantar com a Regina e vimos no restaurante uma berinjela no azeite.
Fiquei com vontade, mas nem sempre posso comer as berinjelas sem ter reações alérgicas. Fiquei na vontade.
Ao chegar à Espanha, encontrei na horta de minha amiga Lesley algumas orgânicas e resolvi fazer do meu jeito sem receita mesmo, baseada no que eu vi.
Resolvi fazer uma para testar:

Lavei-a, acendi o fogão e coloquei-a direto na chama para defumar.  Virava-a aproximadamente a cada dois minutos pelo cabo com cuidado para não queimar a mão.
Ficou como a foto de baixo: incinerada {sem medo de queimar, ela fica pretinha, demora uns 10 minutos}.
Quando apertei com uma colher e ela ficou molinha, coloquei num prato, abri com a faca e deixei esfriar um pouco.
Numa vasilha, coloquei mais ou menos meia xícara de azeite extra virgem espanhol {tenho a sorte de estar num país onde o azeite é divino e abundante} e juntei um dente de alho e um punhadinho{mais ou menos 1 colher de sopa} de salsinha, os dois picados rusticamente. Adicionei um pouco de sal grosso e mexi.
Removi a berinjela morna da casca queimada e separei os gomos que se formam naturalmente quando se puxa de comprido e juntei ao azeite temperado.
Misturei tudo com delicadeza e deixei esfriar.

É melhor deixar de um dia para outro {se você conseguir}...
Comer com um pão fresquinho de entrada ou uma salada, não consigo pensar em nada mais prático e delicioso, no momento.
O azeite que sobra fica espetacular no tempero de saladas ou preparação de pratos.
Ficou bem forte no alho após a marinada de um dia para o outro, então sugiro um dente para cada duas berinjelas. Eu gosto de sabores fortes então, para mim, ficou perfeito.
Ah, deve durar por volta de 4 dias na geladeira.


{Before going away, I went for dinner with my friend Regina and we saw, at the restaurant, an aubergine in olive oil.
I wanted to eat it but, I cannot always guarantee I will not get an allergic reaction, so I did not indulge.
When I got to Spain, Lesley found in her garden some organic ones and I decided to have a go at making them based on what I saw.
I made one only, to test.

I washed it, turned the cooker on and put it directly on the flame to smoke it.
Turned it around by the stalk every two minutes or so {careful not to burn your hand, it is the vegetable that has to be burnt, lol}.
After about 10 minutes, it became incinerated: see the picture below. Let it burn, no fear. It becomes black. 
When I touched it with the back of a spoon and it was very soft, I put it on a plate, opened it with a knife and let it cool for a bit.
In a bowl, I poured about half a cup of spanish extra virgin olive oil {I am very lucky to be in a country that has abundant and divine olive oil} and added one clove of garlic and flat leaf parsley{about one tablespoon}, both chopped rustically. Added some sea salt and mixed it.
I removed the warm aubergine from the burnt skin and separated the pulp lengthwise and added it to the olive oil mix.
I mixed it all carefully not to mash it and let it cool.
It is better to leave it marinading for a day{if you can}...

I suggest you eat it with a loaf of freshly baked bread or with a salad.
Next day it was very garlicky, so use one clove of garlic for every two aubergines, or enjoy the garlic flavours, I love so, for me, it is perfect this way...
I cannot think of anything more practical and delicious, right now.
The olive oil that is left over is wonderful so use it on salads or to prepare other dishes.
Oh, it should keep for about 4 days in the fridge.}

28.9.11

Salvador, Bahia... Alimento para Minha Alma {Food for My Soul...}


Água de Coco, Sol e Praia...
{Coconut Water, Sunshine and the Beach... }


Por do Sol no Farol...
{Sunset Heaven...Farol da Barra...}


                                                        Cajú nas Folhas de Bananeira...
{Cashew Fruits wrapped in Banana Leaves...}


Malagueta...Pau na Mesa...
{Bird`s Eye Chillies...Man Up...}


Maracujá com Cachaça...
{Passion Fruit & Cachaça...}


Acarajé...


Vista do Quarto...
{Room with a View...}

11.9.11

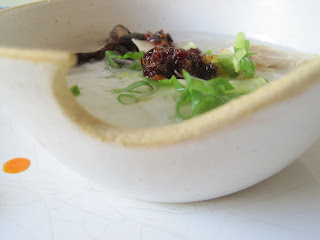
Papa de Arroz Moti com Apetrechos {Glutinous Rice Congee with Bits and Bobs}


Papa de Arroz, Congee, Zhou, Jook...
Muitos nomes para esse prato.
Saudável e delicioso.
Textura cremosa e cheio de potencial para deixar você equilibrado e muito bem alimentado...
Renova e restaura todo seus órgãos e preenche todas as suas necessidades alimentares...
E o mais bacana é que a escolha, tanto do cereal que faz a papa como os apetrechos que a temperam e complementam, é sua...

Aqui segue minha sugestão:

Papa:
1/2 xícara de arroz glutinoso (moti) lavado {or qualquer outro cereal que prefira como aveia, cevada, painço, arooz negro}
6 xícaras de água

Apetrechos usados na foto:

1 colher de sopa de óleo de pimenta
2 colheres de sopa de cebolinha picada
1/2 xícara de peito de frango cozido desfiado
shoyo à gosto
óleo de gergelim à gosto

{Mais sugestões de apetrechos são amendoins salgados, castanhas de cajú, ou outras que preferir, tomates picados, gengibre picado. alho picado salteado, folhas verdes refogadas, pequenos pedaços de carnes e peixes cozidos, ovos cozidos, folhas de coentro... Não há limites para os ingredientes que você pode usar, use sua imaginação e divirta-se...}

Numa panela funda, colocar o arroz e a água. Levantar fervura e logo após baixar o fogo. Cozinhar por, no mínimo 30 minutos.
Vai ficar com a aparência de papa. A idéia é essa mesmo.

Servir num bowl de sopa individual e colocar os apetrechos no centro da mesa para que cada um se sirva daquilo que preferir. Coma bem e curta, tendo absoluta certeza de que seu Corpo agradece...


{Rice Gruel, Congee, Zhou, Jook...
Many names for this dish.
Healthy and delicious with a creamy texture and full of potential to make you balanced and very well fed.
Restores all your internal organs and fulfill all your food needs...
And the best thing is that the choice of grains and all the bits and bobs that you use is yours.

Here is my suggestion:

Base:
1/2 cup of washed glutinous rice {or any other cereal you may want, like brown rice, black rice, barley, oats, millet}
6 cups of water

Bits and Bobs used for the photo:

1 tablespoon of chilli oil
2 tablespoons of chopped spring onions
1/2 cup of cooked and shredded chicken breast
Soya sauce to taste
Toasted sesame oil to taste

{More suggestions are salted peanuts, cashew or any nuts, chopped tomatoes, chopped ginger, sautéed chopped garlic, sautéed greens, left over meats or fish, boiled eggs,  coriander leaves...There is no limit to the ingredients use your imagination and have fun}

Inside a deep pan, put the rice and the water. Bring it to boil and then turn the heat down. Cook for at least 30 minutes.
It will look like it is overcooked. That is the idea.

Serve on individual bowls of soup with the bits and bobs at the centre of the table for people to help themselves to whatever attracts them most...Simultaneously have the absolute knowledge that your Body is very Grateful...


8.9.11

Sopa de Gengibre com Cogumelos Orelha de Pau e Bisteca de Porco {Ginger, Wood Ear and Pork Soup}


Essa pode não ser a melhor foto, mas certamente é a melhor sopa...
Fácil de fazer, rápida e muito saborosa...
Achei num livro que peguei da prateleira {yan-kit's classical chinese cookbook}, tinha tudo em casa, dei uma mudadinha e fiz tudo bem rapidinho...

15g de cogumelos orelha de pau reconstituídos {eles são vendidos secos...Deixe os em água morna por 20 minutos antes de usá-los}
2 bistecas de porco sem osso e sem gordura cortadas em fatias de 1 cm
1 colher de sopa de óleo de canola
8 fatias finas de gengibre
2 colheres de vinho de cozinha chinês {Shaohsing wine} ou conhaque
1 colher de café de sal
3 colheres de sopa de shoyo
1 litro de caldo de frango ou de vegetais quente
3 cebolinhas fatiadas}


Deixar todos os ingredientes separados e prontos para usar.
Escorrer e picar grosseiramente os cogumelos em pedaços grandes.
Aquecer seu wok até o ponto de esfumaçar e adicionar o óleo, o gengibre e mexer adicionando o porco e mexendo por 30 segundos, ainda em fogo bem alto. Adicione os cogumelos bem escorridos com cuidado para que nao explodam ou pulem do wok, mexa bem por 30 segundos.
Adicione o vinho ou conhaque, sal, shoyo e o caldo. Levante fervura e cubra, abaixando o fogo e deixando cozinhar em fogo baixo por 15 minutos. Ajuste o sal e adicione as cebolinas picadas e sirva imediatamante...
É de lamber a tigela...


{This may not be the best photo, but certainly is the best soup...
Easy and quick to make and very tasty...
I found it on yan-kit's classical chinese cookbook, I had everything at home and made a slight adaptation... I made it really quickly{they are sold dried...leave them re-hidrating in warm water for 20 minutes before using them}

15g wood ear mushrooms, reconstituted {they are sold dried...leave them re-hidrating in warm water for 20 minutes before using them}
2 lean pork steaks cut in 1 cm strips
1 tablespoon canola oil
8 finely sliced shards of ginger
2 tablespoons of chinese cooking wine {Shaohsing wine} or brandy
1/2 teaspoon salt
3 tablespoons of soy sauce
1lt of warm chicken or vegetable stock
3 sliced spring onions

Prepare all the ingredients before you start cooking.
Drain and chop roughly the wood ears in big chunks.
Heat your wok till it smokes and add the oil and ginger, mix it adding the pork and stir for 30 seconds, still with the high heat. Add the wood ears well drained and carefully so they will not explode or jump out of the wok, stir well for 30 seconds.
Add the wine or brandy, salt, soy sauce and the stock. Bring it to the boil and cover it with a lead, turn the heat down and cook for 15 minutes. Adjust the salt and add the spring onions. Serve it immediatelly...
It is so tasty you will want to lick the bowl...


6.9.11

Brigadeiro de Capim Santo


Prazer Sem Culpa...

1 xícara de folhas bem verdes de capim santo fresco 
1 xícara de água
1 lata de leite condensado

Bater no liquidificador o capim santo com a água até o suco ficar bem forte e coar. Pode usar a erva batida, que seria descartada para fazer um suco ou chá!!!
Numa panela anti-aderente, adicionar o leite condensado e o caldo já coado do capim santo. No início, fica estranho mas, mexa bem com colher de pau e muita paciência porque o resultado vale o momento zen. Respire beeeeem fundo inúmeras vezes e mexa vagarosamente, com o fogo baixo por aproximadamente 15 minutos até que comece a soltar do fundo.
Quando estiver bem grossinho e da textura desejada, desligue e deixe esfriar.
Não se esqueça de que ao esfriar ele engrossa um pouco mais.
O truque que eu uso é fácil: coloco uma colheradinha em um prato e espero para ver o quanto engrossou enquanto ainda cozinha o restante ou removo do fogo e resolvo, após provar a colherinha já mais fria, se eu continuo cozinhando ou não.

Rendimento:
Para um DVD assistido à dois, raspando a panela, no dia chuvoso à tarde...

Dicas:
Eu gostaria de contar de quanto o capim santo faz bem,  acalma e levanta o sistema imunológico. Mas, com tanto açúcar e lactose na receita, acho que é melhor focar no bem estar do prazer sensual do docinho...

7.8.11

Omelete com Dill {Dill Omelette}


Quando eu estive em Luang Prabang, a velha capital de Laos, eu fui caminhar na encosta do rio Mekong numa tarde ensolarada, antes de ir para o templo meditar e ouvir os monges cantarem, como eu fazia todos os dias às 4h30 da tarde.
Esse omelete estava sendo preparado por uma senhora idosa, ao lado do rio, com alguns carvões acesos e vermelhos embaixo de um wok...
Ela, basicamente, cortou uma mão cheia de dill fresco bem picadinho dentro de uma tigela com alguns ovos batidos e uma pitada de sal e colocou a mistura num wok aquecido com óleo. Após alguns segundos, ela enrolou o omelete em forma de cannelloni e serviu por cima de um pouco de arroz com uma salada verde...
Se não encontrar dill fresco, use as folhinhas novinhas da rama do bulbo da erva doce...Uma delícia e tem o sabor bem delicado...
Desde então fiquei ensaiando para fazer isso em casa...Eu fiz essa semana...
Segue uma foto da minha versão...


{When I was in Luang Prabang,  the old capital os Laos, I took a walk by the Mekong river on a sunny afternoon, before I hit the temple to meditate and hear the monks chant, as I did every day at 4h30 pm.
This omelette was being made by an old woman, by the river, with a few red hot coals under a wok...
She, basically, chopped a handfull of fresh dill and added it to a bowl with some beaten eggs and a pinch of salt and threw the mix on a heated oiled wok. After a couple of seconds, she rolled it into a cannelloni shape and served it on top of some rice with a green salad...If you cannot find fresh dill, use the leaves of a fresh fennel bulb...Delicious and delicate flavour....
I have been meaning to make it ever since...I made it this week...
Here is a picture of my version...}


20.7.11

Água {Water}


             Você Sabia que Beber 8 Copos de Água por Dia Pode Ajudar a Regular o Seu Humor???

       {Did You Know that Drinking 8 Glasses of Water a Day can Help you Regulate Your Mood?}

6.7.11

Minha Sopa de Frango {My Chicken Soup*}


Desde a época em que eu, quase inacreditavelmente, não gostava de comer, tenho uma grande paixão: a comida da minha Avó Regina. O que mais ficou comigo, de tudo que ela fazia, foi o caldo de frango com macarrõezinhos que ela mesma produzia. Sim, o caldo e o macarrão. A carne do frango caipira era saboreado à parte com raiz forte e beterraba ralada e um pouco de sal.
Não vivo sem ele e, hoje creio que, é o prato que eu comeria na minha Última Refeição.
Segundo a Medicina Chinesa, o caldo de frango {caipira de preferência} nutre o sangue e faz com que a sua energia vital {qi}se tonifique. É considerado como alimento que gera medula e equilíbra os órgãos internos.

O Caldo:

1 frango caipira sem pele e sem miúdos {mas use sua imaginação e use para outros fins, é rica em proteína essa miudeza, e não deve ser desperdiçada}
2 cenouras cortadas em quatro
2 cebolas médias cortadas em quatro
2 talos de salsão {com ou sem folhas}
os talos de 1 maço de salsinha
1 colher de sopa de pimenta de reino em grãos inteiros
1 fatia fina de gengibre
1 tomate cortado ao meio sem sementes {opcional}
1 xuxu sem casca e sem a semente cortado em 4

Numa panela grande, colocar todos os ingredientes e cobrir com água mineral ou filtrada e mais 3 dedos.
Levantar fervura e abaixar o fogo. Cozinhar em fogo baixo e semi tampado, removendo a espuma ou impurezas, por aproximadamente 3 horas. Desligar. Deixar esfriar e coar, retirando a carne. Reserve o caldo. Se for usar macarrões, ferva-os separadamente e agregue ajustando o sal e pimenta antes de servir, fica ótimo com dill picadinho por cima...
Os vegetais eu como como entrada ou acompanhamento regado de azeite extra virgem e uma pitada de sal.
Use o caldo para fazer sopas, adicionar em risotos ou somente como acompanhamento às refeições.
Delícia...Ainda mais no prato abaixo que roubei da casa de meus Pais, cheia de saudades da época de menina...Meu prato oficial de sopa de frango e outras comidas conforto...


*{Since the time when I, almost unbelievably, did not like eating, I have a great passion: my granny Regina's food. The dish that most stayed with me, of all of her cooking, was her chicken soup with noodles that she used to make herself. Yes, she made the stock and the noodles. The chicken itself was eaten separately with beetroot and horseradish and a little salt.
I cannot live without it, and I believe today, that it would have to be my Last Meal.
According to Chinese Medicine, chicken stock {organic preferably} nourishes blood and tonifies your vital energy {qi}. It is considered the food that produces marrow and balances internal organs.

The Stock:

1 organic chicken without the skin and no guizards{but use your imagination and make something else with them as they are rich in proteins and should not be wasted}
2 carrots chopped in four
2 medium onions chopped in four
2 celery sticks {with or without leaves}
the stalks of a big bunch of parsley
1 tablespoon of black pepper {whole}
1 seeded tomato chopped in half {optional}
1 slice of fresh ginger
1 chow chow peeled and seeded chopped in four

In a big pan, put all ingredients and cover with mineral or filtered water plus 3 fingers. Bring it to the boil and lower the heat. Simmer in low heat and semi covered, removing any scum ou impurities that may rise, for about 3 hours. Turn it off. Let it cook and strain it, reserving the chicken. Reserve the stock separately. If you are going to serve it with noodles, cook them separately and add before serving, seasoning the soup. It tastes very good with choppped dill mixed in...

The cooked vegetables, I eat as a starter or a side dish with some olive oil and salt on top . Use the stock to make soups, add on risotos ou as a side dish  with your meals.
It is Delicious...
Specially when I use the plate I took from my Parents home, filled with nostalgia from my girly days....
This plate you see above is my official chicken soup plate and other comfort foods...}

26.6.11

Beetroot and Dill Soup


A couple of winters ago, in London, my friend Lesley suggested I made a Beetroot and Dill Soup. I made a test in her marvelous kitchen and this is the recipe of the soup we ate...
I make it, nostalgically, every time I see fresh beetroots and a fresh bunch of dill available.
It is delicious served hot or cold...

Be Truth Soup:

4 fresh beetroots peeled and chopped coarsely
2 tablespoons extra virgin olive oil
1 onion peeled and quartered
1 clove garlic chopped
1 celery stick chopped in 6
1 bay leaf
1 teaspoon oregano
1 tablespoon Marigold Bouillon {or hot fresh veggie stock}
Salt and freshly ground pepper to taste
2 tablespoons tamari sauce
2 tablespoons balsamic vinegar
1/2 cup of chopped fresh dill

Stir fry the onions, garlic and the olive oil for a minute or so and then add the beetroot, the celery, oregano and bay leaf. Add water{or vegetable stock instead of water}to cover the solids plus one extra cup and let it boil. Add the bouillon, if you are using it. Turn the heat down and let it cook with the lid on until the beet is soft. Add the other ingredients except the dill. Blitz till all is very smooth. Adjust the seasoning and add the dill. Serve it hot or cold.


About Beetroot and Fresh Dill...
It is supposed to freshen up your stomach and helps out nourishing your blood, good in cases of anaemia. It is rich in glutamine and antioxidants and it helps you increase the number of white blood cells. It is known to help detoxify your liver.
Dill is a warm herb that helps digestion and regulates ones appetite. It is rich in calcium, iron, magnesium and high in fibre.

23.6.11

Espremedor de Batatas {Potato Masher}


Desde criança tenho claras memórias de purê de batatas sendo servido para nós…
Comida conforto para o Corpo e para o Espírito...
Me lembro de minha Avó fazendo travessas de purê para acariciar os nossos estômagos. 
Sua comida, um ato de amor…
Ela amava cozinhar. Seu purê era fofinho, macio e suave, como algodão.
A receita eu não sei, e, como muitas de suas receitas, essa se foi com ela, em silêncio e em paz…
Semana passada, ao encontrar esse espremedor de batatas no armário da cozinha da casa de praia da nossa família, perguntei à minha mãe se ela ainda o usava. Ela me disse que não cozinhava batatas há anos. Cortando uma longa e emocional conversa, ganhei de minha Mãe o espremedor.
Junto com muitas memórias, uma herança mais que perfeita…

{Since I was a child, I have clear memories of mashed potatoes being served to us…Comfort food for the Body and Spirit...
I remember my Grandmother making bowls of it, to caress our stomachs. 
Her cooking was an act of love…
She loved cooking. Her mashed potato was soft, light and fluffy, like cotton wool.
The recipe I don’t know, and, like many of her recipes, this one went with her, in silence and peace…
Last week, when I found the gadget in our beach house's  kitchen, I asked Mum if she still used it. She told me she had not cooked potatoes for years.
Cutting a long emotional story short, I got from Mum the masher as a gift.
A more than perfect heirloom...}

17.6.11

Meu Potinho Lindo com Compota de Banana e Aniz Estrelado {My Beautyful Bowl with Banana Compote and Star Anise}


Não há muita coisa nesna vida que dê mais satisfação do que comer uma comida plantada por você mesma ou por alguém que você conheça e servir essa delícia num potinho que você mesma fez...
Esse potinho eu fiz e as bananas são da casa dos meus Pais...

{There are very few things in life that give you as much satisfaction as eating food that has been grown by yourself or someone you know and to serve it in a bowl that you have made yourself....This bowl was made by me and the bananas were grown in my Parents home...}


Terceira vez no Torno...Lugar onde me sinto Feliz...
{Third go in the Wheel...The place where I feel Happy...}


Fiz um Par, ambos em barro Tabaco...esmaltei um em Branco e o outro em Verde Cobre.
O resultado me inspirou na criação de vários semelhantes...Minhas refeições nunca mais serão as mesmas...
{I made a Pair, both in Tobacco clay...Glazed one in White and the other in Copper Green. The results inspired me to create many similar pieces..My meals will never be the same...}

A Compota...

Você precisará de uma dúzia de bananas nanicas maduras{com algumas pintas para aumentar o sabor e o elemento potássio se manifestar presente}.
4 xícaras de água filtrada ou mineral, 2 xícaras de açúcar, 3 estrelas de aniz estrelado e 4 cravos da índia.
Colocar a água, açúcar, aniz e cravos para ferver e assim que isso acontecer baixar o fogo para médio e deixar que reduza até um pouco menos que a metade do líquido inicial.
Cortar as bananas em quadradinhos to tamanho da falange de seu dedo indicador e adicionar. Ao levantar fervura novamente, abaixe o fogo e cozinhe por 5 minutos e desligue o fogo. Deixe esfriar. Sirva com um aniz estrelado ou cravo decorando o doce. Cai bem só ou acompanhado....

Eu comeria...
Com sorvete
Por cima de fatias de frutas
Recheando maçãs ou peras ao forno
Recheando crumbles e tortas
Salpicado de Aveia em Flocos
Com Granola com Iogurte
Com Chá de Gengibre, Cidreira, Capim Santo, Cardamomo ou Mate...


{ The Compote...

You will need a dozen ripe bananas {with some spots to increase flavour and so that the potassium in them can be present}.
4 cups of filtered or mineral water, 2 cups of sugar, 3 star anise and 4 cloves.
Boil the water with sugar, the star anise and cloves. Bring the flame to medium and let the liquid reduce to a little less than half. Cut the bananas in four lengthwise and then in pieces as big as a phalange of your finger and add to the syrup. Cook for 5 minutes and turn it off. Let it cool down. Serve it with a star anise on top to decorate.
It is delicious on its own or with a little something extra...

I would eat it ...
With Ice cream
On top of sliced fruit
Filling for baked apples or pears
Filling for crumbles or pies
With Oats spread on top of it
With Granola and Yogurt
With Ginger, Lemongrass, Melissa, Cardamom, Earl Grey or Black Tea...}

10.6.11

Arroz no Wok {Fried Rice}

Meu Lig Lig Pessoal {My Own Take Away}


Sexta Feira à Noite me lembra muito das palavras preguiça e delivery. Mas, é difícil eu ter preguiça de cozinhar, ainda mais se eu tiver na geladeira coisas que juntinhas ficam deliciosas.
Hoje cheguei do dia SPA e resolvi mostrar, numa caminhada pelas ruas{30 minutos}, as minhas novas e louras madeixas. Afinal, seria um desperdício terrível voltar direto para casa. Andei pensando no que ia jantar e fiquei cheia de vontade de comer chinesices{o que não é novidade} e ao chegar em casa, eu percebi  que eu tinha o que precisava para fazer arroz no wok, já que não curto pedir comidas prontas que vem cheias de insalúbres sei lá o quês.
Na foto acima, dá para ver os ingredientes que são: nirá, moyashi, sobrecoxa de frango {já cozida, que se eu fosse vegetariana, obviamente omitiria da receita}, shiitake {que em japonês, se pronuncia shiÍtake} e um punhadinho de algas hidratadas, que são espetaculares para ajudar a mulherada a se livrar de cistos, além de serem riquíssimas em iodo, o que além de vários atributos à saúde, ajuda na árdua tarefa de uma mulher com mais de 40 anos em seu emagrecimento {não é o meu caso, rsrs}.
Receitinha abaixo...
Ficou DELY!!!!!!

Você precisa:
1 colher de sopa de óleo vegetal
1 dente de alho picado
1 colher de sopa  de gengibre picado
1 sobrecoxa cozida de frango desfiado grosso
4 shiitakes secos em 1 xícara de água por 20 minutos
1 colher de sopa de algas hijiki em 1 xícara de água por 20 minutos
1/2 xícara da água usada para hidratar os cogumelos e alga
1/2 xícara de milho verde cozido
2 colheres de sopa de molho de ostra ou de cogumelos
1/2 xícara de arroz cozido {de preferência no dia anterior para que os grãos se soltem e mantenham sua forma no wok}
1 xícara de moyashi
1/2 maço de nirá cortado em pedaços de 3 cm

Deixe todos os ingredientes prontos para ir ao fogo e separados nas porções corretas
antes de começar a cozinhar.
Aqueça o wok no fogo mais alto que conseguir e adicione o óleo, seguido do gengibre, alho, shiitake, alga e frango, mexa bem por 10 segundos. Adicione o molho de ostra, o milho verde e o caldo. Mexa bem e adicione o arroz, mexendo ao aquecer para separar os grãos e os misturar com os vegetais. Adicione o moyashi mexa e adicione o nirá. Mexa bem e sirva imediatamente.


{Friday Night reminds me of the words lazy and take away. But, it is hard for me to feel lazy when it comes to cooking, especially if I have stuff in the fridge that will taste delicious when put together.
Today, I got home from a SPA day and decided to show off on a walk around the street {30 minutes}, my newly blondled curls. After all, it would be a terrible waste to go straight home.
 As I walked and thought of what I would have for dinner,
I had a craving for chinese food {nothing unusual} and I realized I had in the fridge all I needed fto make fried rice, once I am not into ordering take aways that come full of unknown & unhealthy stuff in it.
In the picture above, one can see the ingredients I had: garlic chives, beansprouts, chicken thighs {already cooked and, if I was a veggie, I would obviously omit it from the recipe}, shiitake mushrooms {in Japan, they pronounce she-ee-tacky} and a handful of re-hidrated seaweed, which is spectacular to help out women eliminate ovarian cysts and fibroids, besides being rich in iodine, which has many healthy properties and help out women over 40 with the hard task of losing weight {clearly not my case, lol.
Recipe below...
It tasted Delish!!!


You need:
1 tablespoon of vegetable oil
1 chopped clove of garlic
1 tablespoon of chopped ginger
1 cooked and roughly shredded chicken thigh
4 dried shiitake mushrooms in a cup of water for 20 minutes
1 tablespoon of hijiki seaweed in a cup of water for 20 minutes
1/2 cup of the water used to hidrate the mushrooms and seaweed
1/2 cup of sweet corn
2 tablespoons of oyster or mushroom sauce
1/2 cup of cooked rice {preferably from the day before so that the grains go loose and maintain their shape on the wok}
1cup of beansprouts
1/2 bunch of garlic chives cut in 3 cm pieces


Prepare and measure all the ingredients before you start cooking.
Heat the wok in the highest flame you can get and add the oil, then the ginger, garlic, chicken, mushroom and seaweed and stir for 10 seconds. Add the oyster or mushroom sauce, the beansprouts, the sweet corn and the stock. Stir well and add the rice, mixing to heat up and separate the grains to mix them with the vegetables and at the end mix in the beansprouts, stir and then add the garlic chives. Stir and serve immediately}.